August 19, 2026

Raising Monarch Butterflies, with 10 Pro Tips

Whether you're new to raising Monarchs or it's not your first rodeo, I'm sharing some tips today to help ensure you're successful. These are tips you don't often see published but can make a real difference for your butterflies.

Tip 1: All butterflies lay multiple eggs on a single plant. The best placement is on the underside of leaves but when host plants are in short supply you'll find eggs on top, too. Planting more host plants can increase proper placement and survival rates. For monarchs, there is only one host plant: milkweed. Choose a variety that is suited to your region, for example Showy Milkweed in Colorado, Swamp Milkweed in Virginia.

It's estimated that as low as 2% will survive to become a butterfly.

Tip 2: Collect the ones you wish to raise while eggs. From tiny caterpillars all the way to chrysalis, they are vulnerable to a variety of parasites. Bringing them in as an egg increases your chances of successfully raising a healthy butterfly.

Inexpensive setup but frass collects on the lid. A yogurt container or something with a flat lid is easier to keep clean.
Tip 3: A few floral tubes are worth acquiring. I bought mine online but really should have Wished in my local Buy Nothing Group. Floral tubes are good because they can be laid on their side without spilling water, and it's easier for caterpillars that fall off the milkweed to get back on. Especially when competing for leaves, caterpillars fall off their milkweed frequently. You'll often find two caterpillars munching on the same stem, thrashing about if they touch one another. The larger the caterpillars, the more likely a fall. 

Look for skeletonizing before carefully turning over leaves, to avoid harming tiny caterpillars.

If you have a sprig of milkweed in a floral tube, presenting the caterpillar with fresh food is a simple rescue. Otherwise, encourage the wayward caterpillar to climb onto your hand and hold them against some milkweed until they walk off. Be patient. If you've ever tried to get a cat — a feline one — to eat a special piece of food you put literally in front of their face… it's like that. 

Found this little one wandering on some lantana.

Tip 4: Late 5th instars will absolutely refuse food. If it's on a walkabout, consider relocating it instead. Fast-paced walking or a good distance away from its host plant are clear signals that it's ready to pupate. If you've never seen a chrysalis before, this is a terrific opportunity for you. Move the caterpillar somewhere it can climb that offers a safe place to transform. Most likely you'll be rewarded within the next 24-36 hours.

They'll frequently stay on one leaf for 24-36 hrs, not moving. 

Tip 5: They spend LOTS of time doing seemingly NOTHING. Don't mess with them! Magic is happening inside. Doing nothing for a full day is a precursor to molting. Be prepared for a photo opp. 

Tip 6: A yellow head is a sure sign of a freshly molted caterpillar. It takes a couple of hours for the color to develop. In the video, the black striped lens cap hasn't been flicked off the head yet. 

Tip 7: During and after molting, they are particularly fragile. Make sure to not jostle them. Exophagy, eating the shed exoskeleton, helps the caterpillar conserve energy and provides resources to resume rapid growth. 
Silk pad started, viewed with a macrolens.

Tip 8: Monarch caterpillars seek a high place to pupate. They'll pick a spot to rest, often horizontally, for a day or so. Warmer outdoor temperatures speed things up while A/C indoor temperatures slow things down. Remember, resting doesn't mean doing nothing! They'll play dead if they feel threatened so you probably won't see it, but they're throwing strands of silk to secure their spot. It's very difficult to see, even with a magnifying glass.

Tip 9: They can fit through a honeybee queen excluder no problem. I laid my honey bucket mesh bag over top to keep them in. When I lifted the bag to take a peek and heard shredding, I learned that the caterpillar throws silk pretty far when building the pad from which the chrysalis will hang. The sound of tearing silk is distressing! I hope I've saved you that feeling of guilt.

Tip 10: There is a way to tell a male from a female while in chrysalis form!

Look below the two black dots, above the first horizontal line. That tiny slit means female.
BONUS TIP: I have a macrolens on my phone to capture this detail. It's no longer in production, but I hear that Apexel lenses are really good, and they're inexpensive, too.

No slit = male. Can't wait to welcome you to the world, Theo!

Last year, I named my first big caterpillar Theo on a whim. "He" was big and easy to identify from the others in my caterpillar enclosure (a 5-gallon bucket). Then one morning, lots of molting had happened and everybody was Theo. As it turned out, his pace stayed ahead of the rest and he turned out to be a boy after all. 

August 15, 2026

How to Grow and Harvest Ripe Olympian Figs

Yes, Olympian Fig trees can be container-grown. Started from a cutting in the summer of 2023, my 3-year old tree is in a 17-inch pot. I bottom dressed it this Spring, as it had settled down about an inch since it was potted in April 2025. It was a good opportunity to inspect the roots. Thankfully, there were no signs of root knot nematodes.

What's this got to do with bees? As bee survival rates decline, it's important to know what your #GrowItEatIt options are. Figs are a food crop you can reliably produce without bees.
It's a "self-watering" pot, which means it has a reservoir. Figs are thirsty trees, and it turns out that 12 inches of rain in the month of July is just the right amount. That is record rain, but generally speaking Coastal Virginia is a very wet place, so I lined the sides of the pot with Better Than Rocks, to discourage root rot and encourage air pruning of the root ball. The latter 🤞 should help keep the size of the tree in check. The red mesh on top of the soil is repurposed onion bags, to stop squirrels from planting acorns, another item of abundance here.
 
Especially when it rains that much and strips the soil of nutrients, regular fertilization is important for potted trees. Just don't feed when it's really hot and plants are stressed. 
Olympian can produce a breba crop, and this Spring we had 12 figlets—that fell off when the tree went into leaf-growing mode. 
 

This is our very first fig harvest. The Summer crop began to develop in early June. The ribbed figlets were steadfastly green for more than 2 months. Once they go a little jaundiced, ripening happens quickly: 3-4 days and they're ripe. They're ready to harvest when they slip off the tree, like a ripe melon slips off its vine. 


After a very wet (and hot) July, we had a very hot dry spell, followed by a couple of severe thunderstorm just as the figs were ripening. With the irregular watering, one started to crack. An organza bag worked to protect the fruit from sugar ants while it ripened. 

Four figs. That was our entire crop. A nice sized fig (paring knife in photo for scale), they weighed between 1.25 and 1.75 ounces each. Thin skinned, creamy smooth, and delicately sweet… we couldn't be happier with our homegrown figs!

My Prune & Propagate Plan

I plan on pruning this tree for maximum fruit production next year, and to have cuttings! For both to happen, I must wait until the tree is fully dormant (February to early March).  

What about you? Have you grown figs? Are you interested in a cutting? 

October 15, 2024

Deep Top Bar Hive, designed by Marty Hardison

The Deep Hardison Hive

Here is a new picture of the deep Hardison Hive. Marty has enjoyed 100% survival rates in them, and he's fine-tuned their construction. The plans to construct the original Hardison Hive are included in The Appropriate Beehive. On clicking through, you will need to request access to the document.

"There is nothing fancy about adding 4 inches to my standard hive. I just cut 4-inch wide boards of the same wood the hive body was built out of. Then drilled down the center of the boards deep enough to screw them into the existing hive body. But I also screw the end of the boards together. This enables my bees to have a larger enough cluster to survive Denver winters."

As you can see, he also adds protection over that wide seam. Nothing fancy. Once the bees propolize the inside, the seam will be wind- and water-tight. If you have any questions for Marty, just drop a comment. I'll make sure he gets it!

P.S.: Marty always says he's doing a good job as a teacher if his students want to do something contrary to his way. It means they're thinking. So if I were building a deep hive, I think I'd add holes as upper entrances (like Wyatt Mangum does) and some flashing just under that new face plate to create a little awning.

October 13, 2024

Beeswax Wraps & 3 DIY tips that work!

Determined to make a substitute for plastic cling wrap and foil, today's post is to share lessons learned from making beeswax wraps. In case you've got the crazy idea to make your own beeswax wraps, I made all the mistakes so you don't have to. I hope I can save you some trouble.

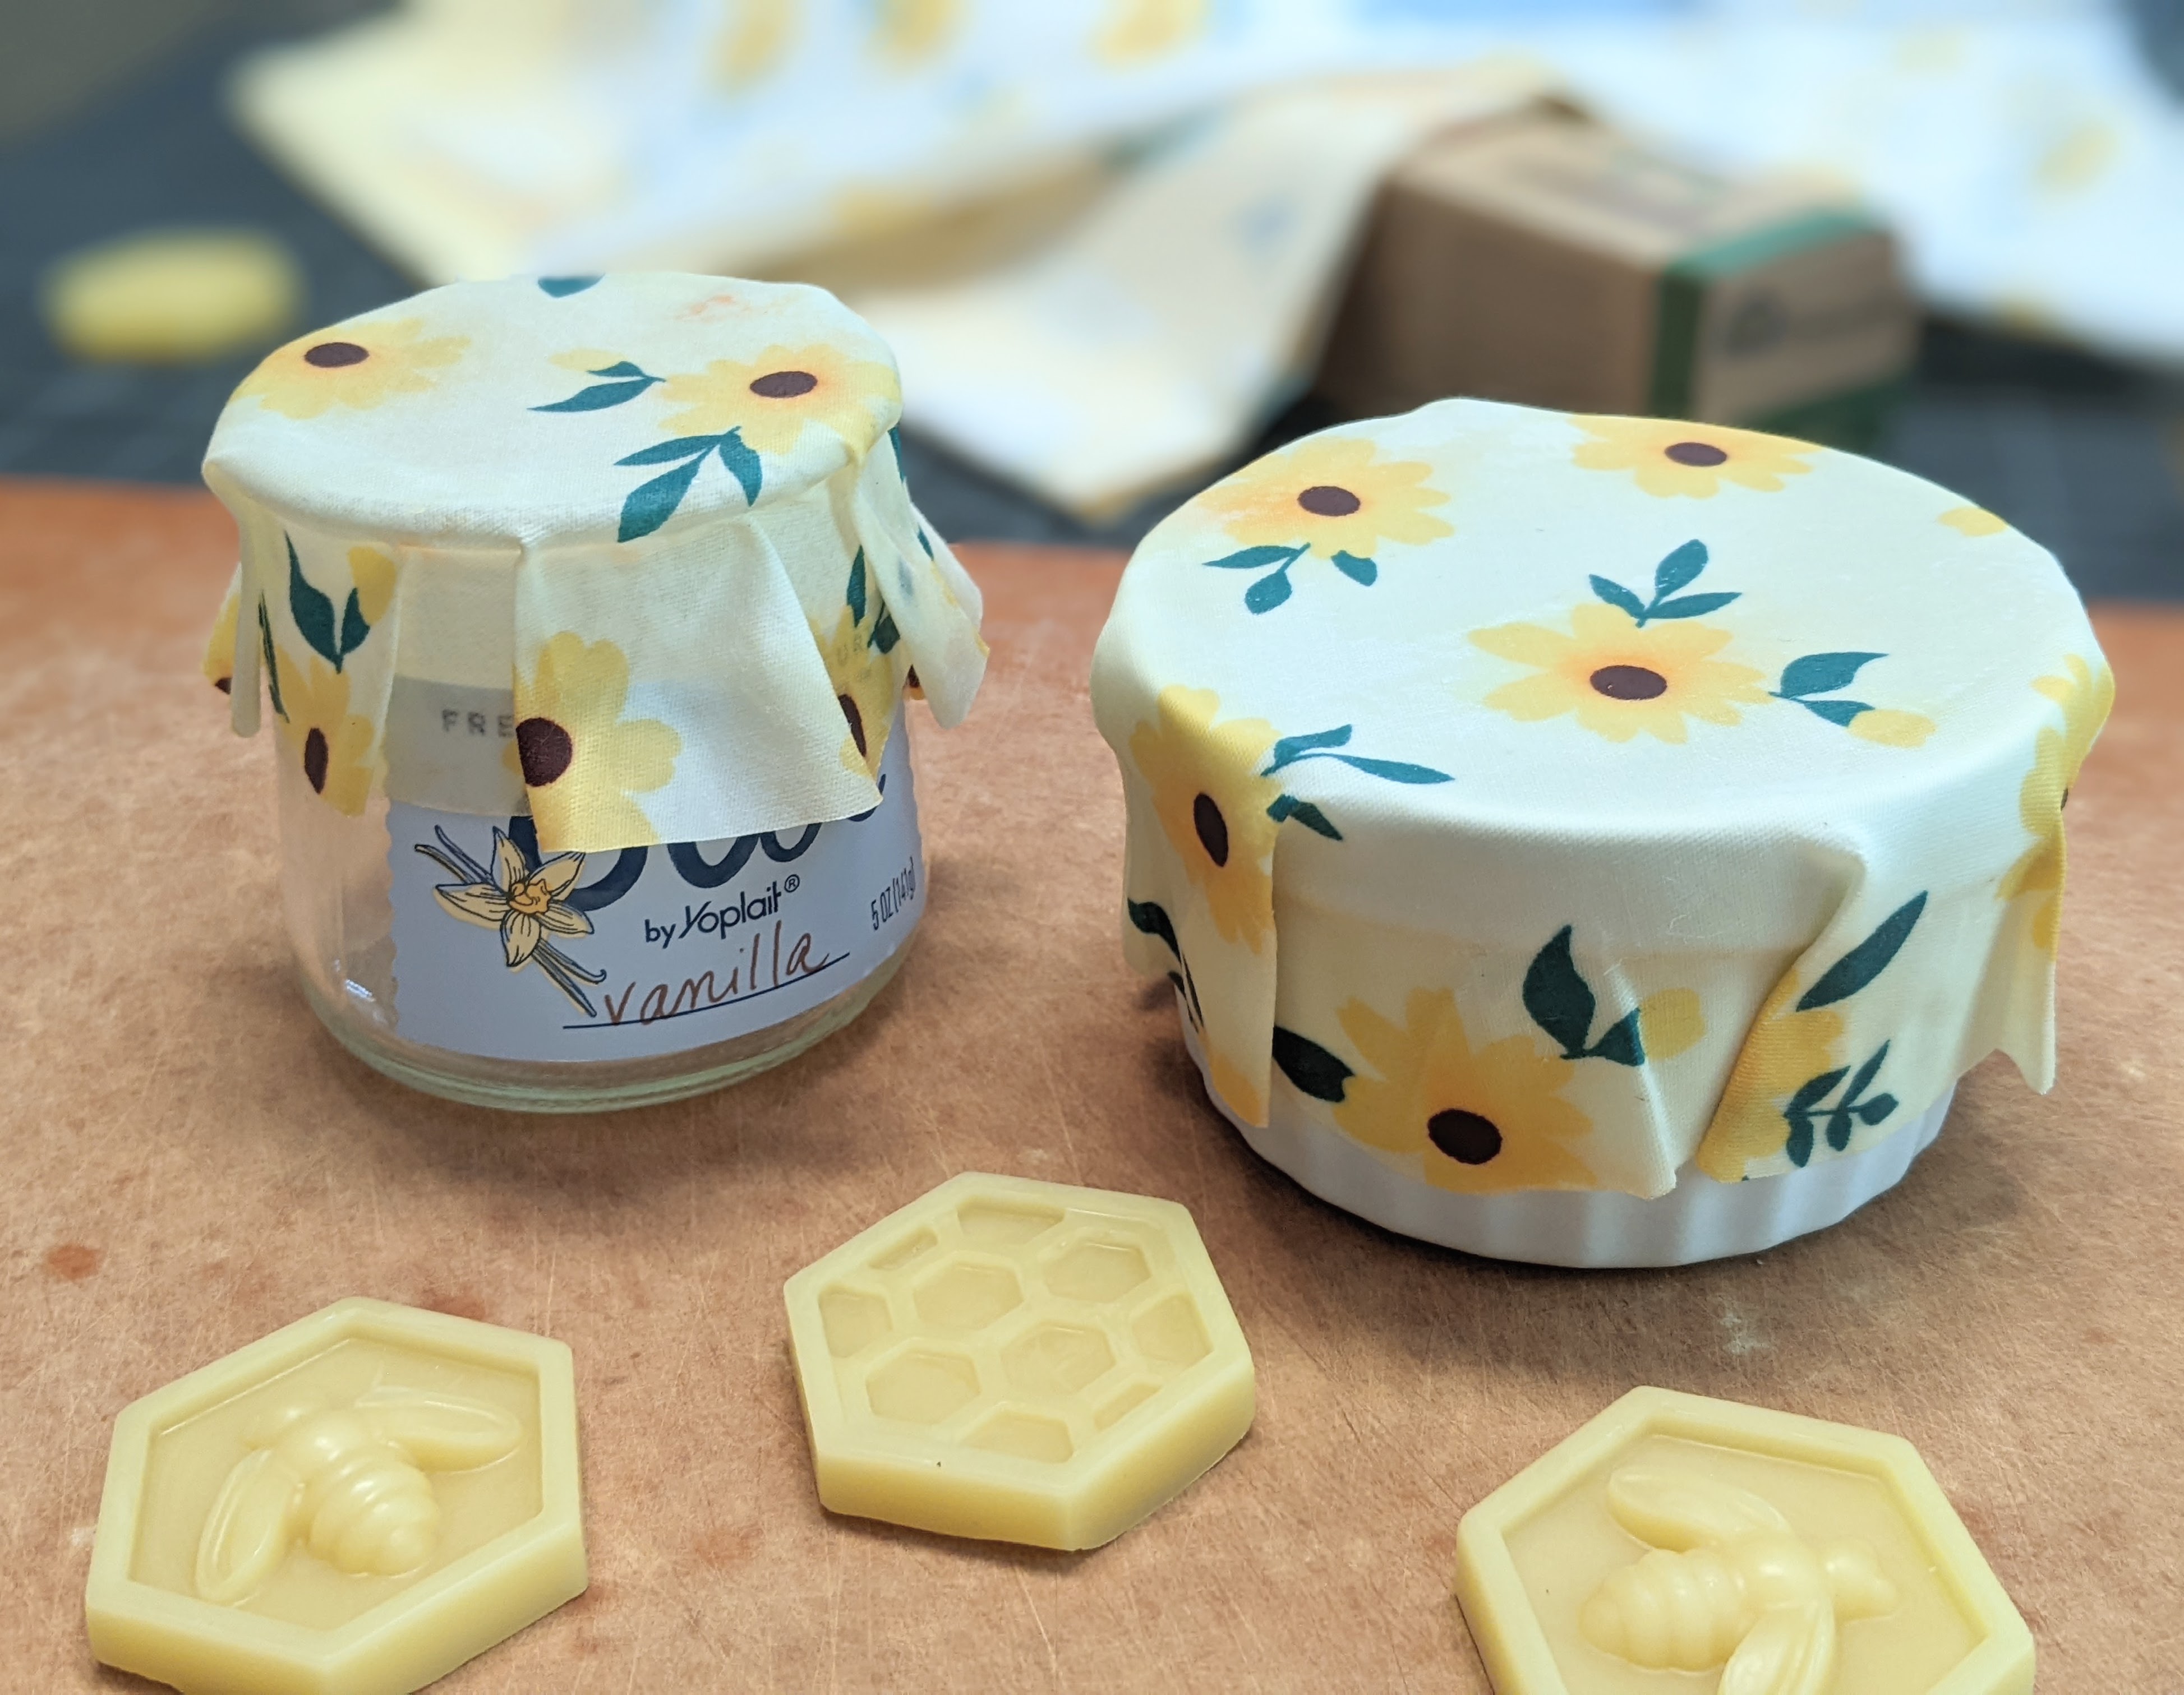
DIY beeswax wraps that work! A 5" wrap covers a Oui jar perfectly. A 7" wrap is more than ample for an 8-ounce ramekin. If you really want to skip the mess, you can buy the ready-to-use wafers in my Etsy shop.

Tip #1: Don't make wraps with nothing but beeswax. Wraps made with pure beeswax alone are brittle and don't cling at all. If you're a beekeeper with a Warré Hive and tried this method, the 100% beeswax wrap "fails" are fantastic between the top bars and quilt!

Tip #2: A little oil provides flexibility, so your wraps bend without cracking. A wax/oil version is a great foil substitute. It's bendy and holds its shape but doesn't make an airtight seal. Stay away from cooking oils with short shelf lives. I like meadowfoam, which is a North American native wildflower. It has a longer shelf life than jojoba oil.

Tip #3: Resin is what puts the cling in DIY cling wrap. It gives it some stickiness. If you're wondering about using propolis—the resin-like substance made by bees—at the amount needed to create cling, it imparts a strong odor and bitter taste to wrapped items. And I mean really bitter. Invest in pine resin in powder form; chunk form takes too long to melt, which degrades your wax/oil. A 1-pound bag of pine resin will make about 12 dozen wraps. (If you find a smaller bag for less than $15, please let me know!)

If you're ready to embark on making your own, my formulation makes an extra sticky blend for beeswax wraps that actually work! I'm providing volume measurements for convenience but, especially if small-batch crafting, I highly recommend a quality digital scale like a MyWeigh, which is accurate to a tenth of a gram.

DIY Beeswax Wraps Recipe

Makes ~(5) 12"x12" wraps.

60 g. beeswax (about 1/2 c. pastilles)
20 g. pine resin (about 2 1/2 Tbsp.)
12 g. jojoba (1 Tbsp) oil

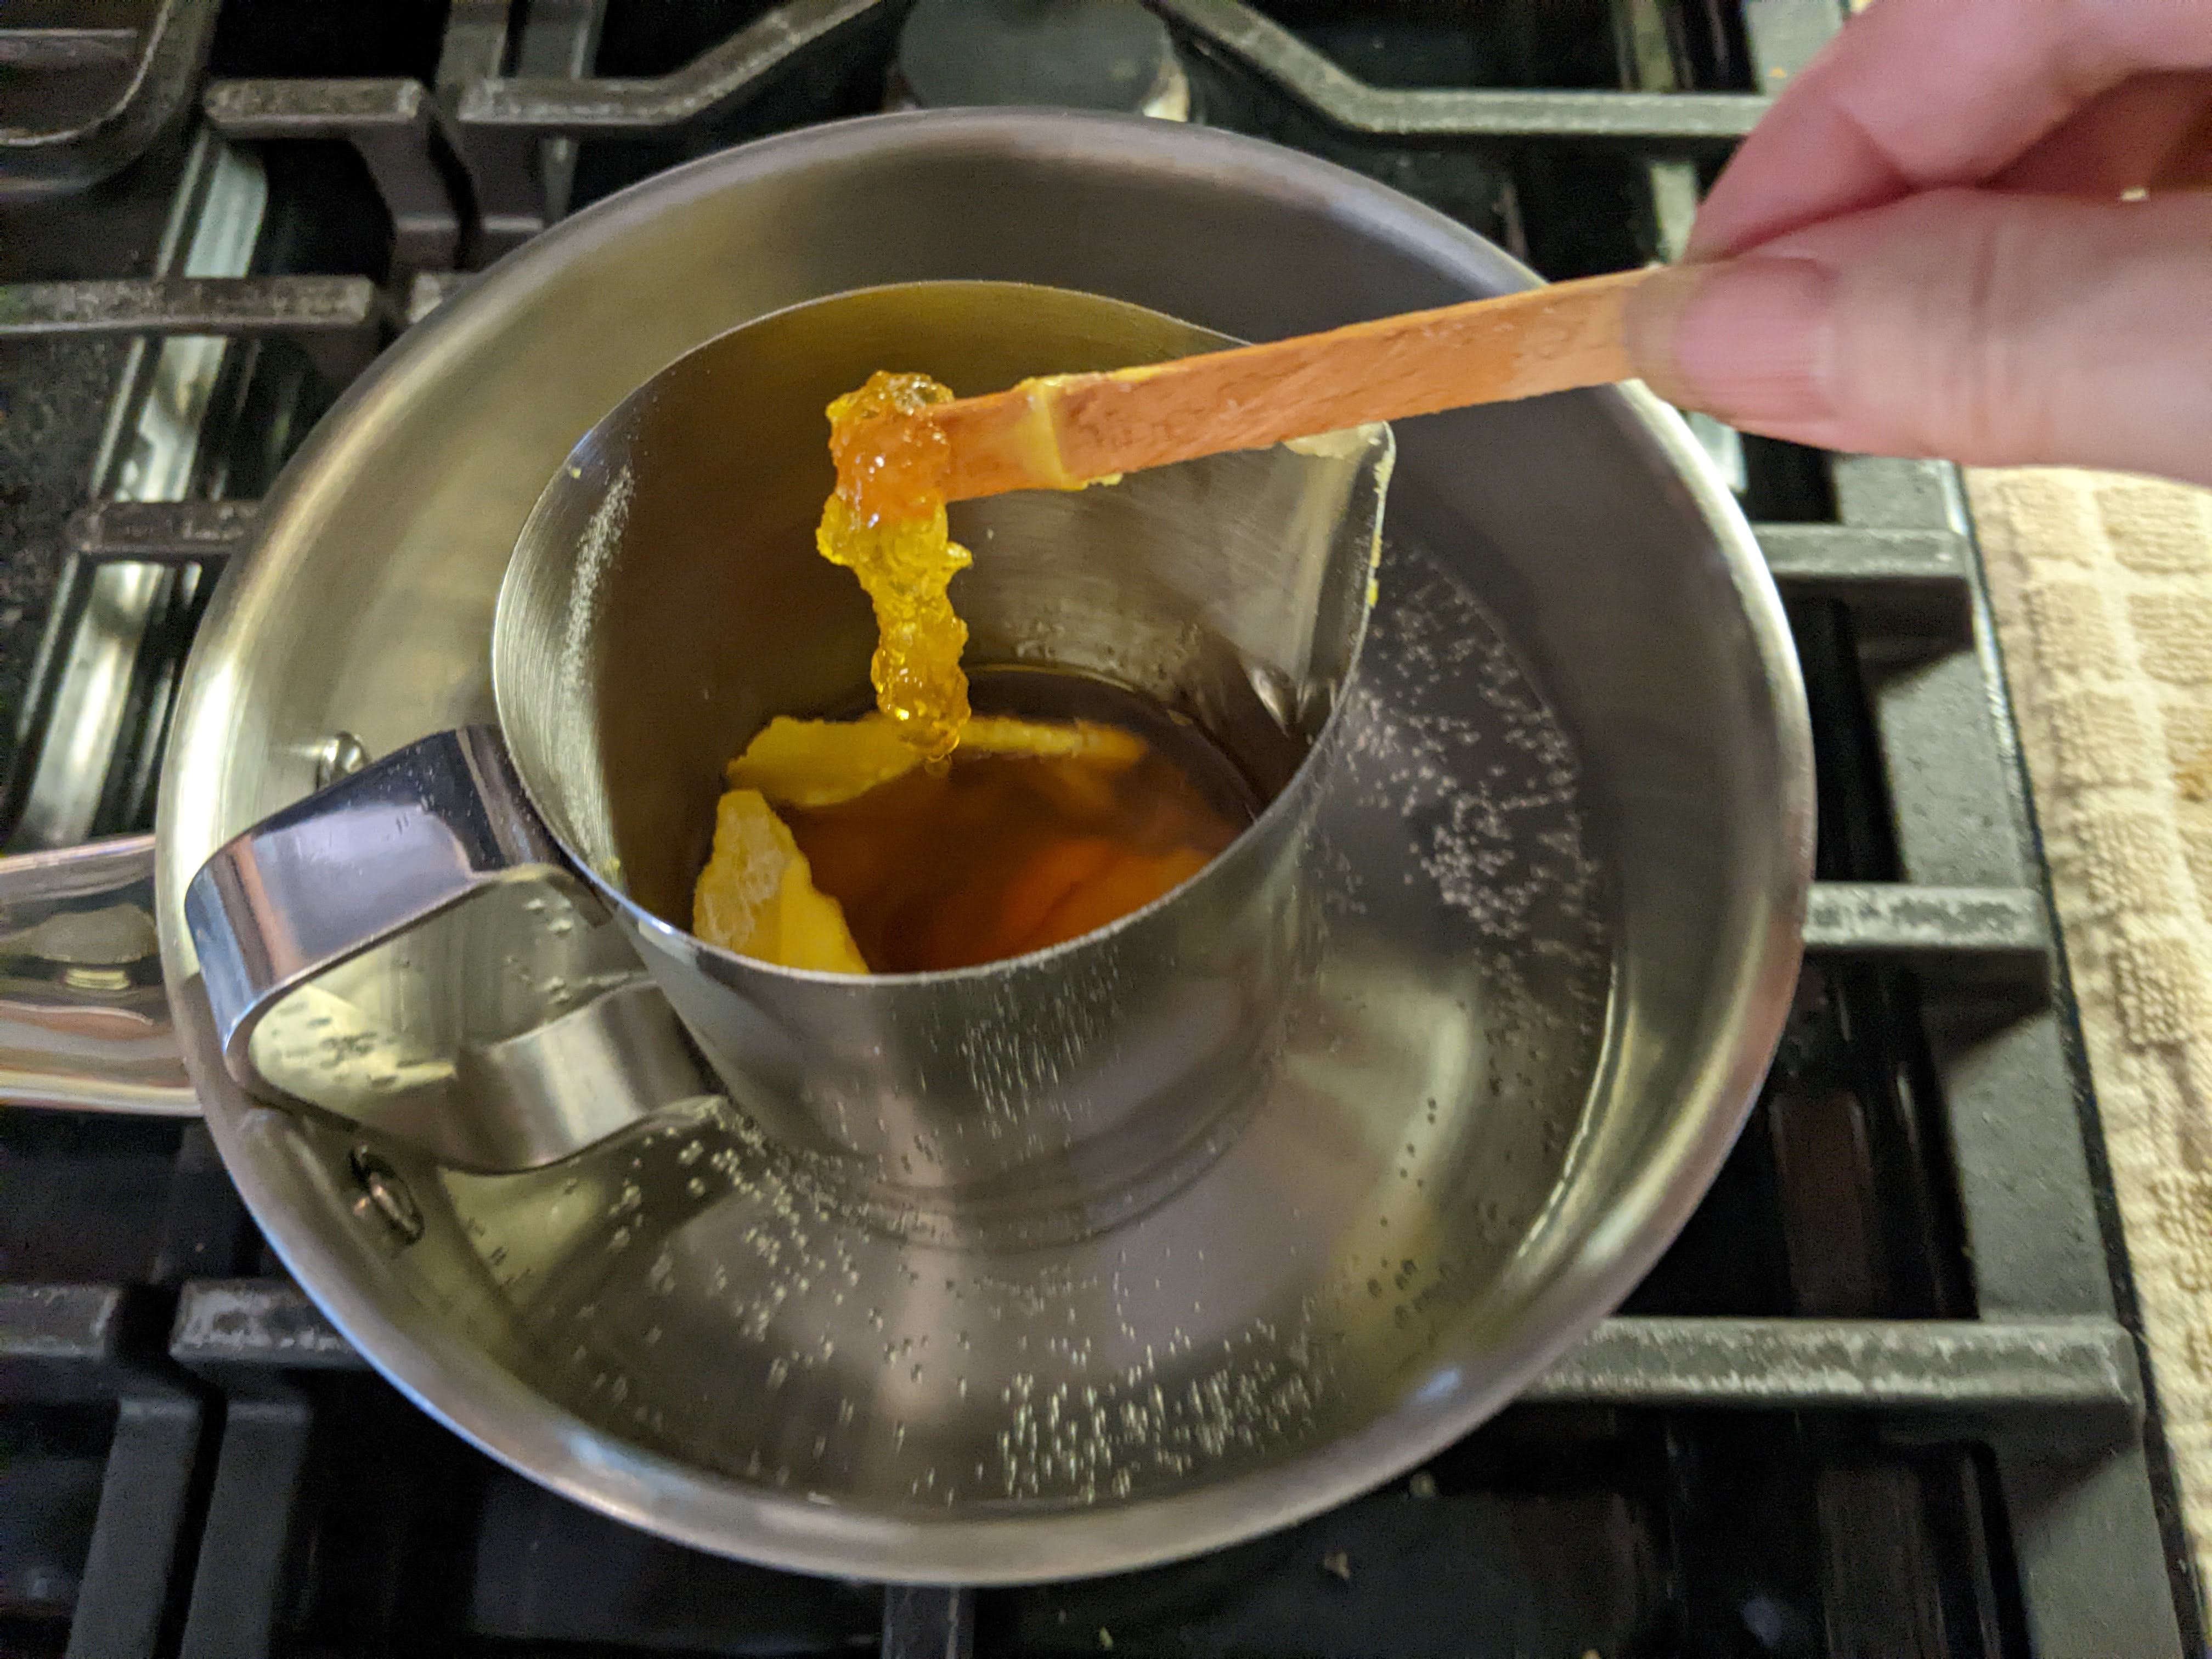
Melt everything together using a water bath, stirring until completely blended. I use a milk frothing pitcher set in a small sauce pot over medium heat, and it takes about 15-20 minutes to make sure the resin is completely dissolved. The resin sinks to the bottom, so you'll know it's fully dissolved when you don't feel your stirring tool dragging anymore. Double-check that there aren't globs stuck to your stirrer, though.

PRO TIPS: Resin needs a good amount of heat to melt. Maintain a high simmer. Wet your resin powder with the carrier oil first, to help prevent clumping.
Instead of brushing the liquid mixture onto fabric, I pour it thinly into molds. Once set, I pop out a few wafers and iron them into fabric that's in-between sheets of parchment paper. You want to barely saturate the fabric, but if you put on too much just use the iron to push the excess out past the fabric edges (but still inside the parchment sheets). Using another piece of fabric to absorb it, it's almost zero waste and cleanup is a breeze. This is especially why I love the wafer/iron method.

A "cake mold" like this one is about $9 on Amazon. Clean each well with a cotton swab and rubbing alcohol for a polished finished piece.

Beeswax Wraps Wafers

Quick to melt, three wafers will treat a large piece of tight-weave fabric. My first beeswax wraps were made out of an old but high-quality cotton percale pillowcase, upcycling at its best. An economical option is remnants at your local fabric store (mine is Joann), or buy quilting squares or fat quarters are cute and fun.

I prefer to wax my fabric first and cut it to size afterward, which minimizes fraying.
Use a rotary cutter or pinking shears if you have them. Either will reduce fraying but you'll always have loose threads… don't pull them! You can hem the edges if you're sewing the fabric into a baggie.
It's easy to pinch pieces off the wafers, to ensure even coverage. You move the pools of wax with your iron so you don't have to be perfect or precise. Be sure to place a piece of parchment paper underneath and on top.

Because my friends say things like, "You should sell these on Etsy," you can buy my Beeswax Wraps Waxing Wafers, four for $4.

etsy.com/shop/BackyardBeeHive – DIY beeswax wraps waxing wafers, premixed

If you'd rather not spend $15 for resin and make 144 wraps, then these ready-to-use waxing wafers are for you! If you have year-old wraps that have lost their stickiness and need a refresh, these waxing wafers are for you! Or if you have beeswax wraps that weren't sticky enough in the first place, these waxing wafers are for you!

My Beeswax Wraps Waxing Wafers are four for $4 (plus cost to mail). Four wafers will make up to nine (9) wraps with plenty leftover for touch-ups. Depending on how you cut it, from one quilting square you can make:

  • three 7x7" (small) and two 10x13" (medium) wraps
  • 3 small, (1) 7x13" (rectangular medium), and (1) 13x13" (large) wrap
  • 3 small and 1 extra-large 13x20" wrap (perfect for covering a lasagna pan with handles)

Remember, you're not limited to squares or rectangles. I find rounds to be the most versatile. The cast-offs make terrific fire starters, and I mean terrific. 🔥 Or don't cut the quilting square at all, and sew it into a plastic-free baggie. The possibilities are endless. 

DIY Beeswax Wraps Waxing Wafers

BONUS TIP for making it to the end of this post: Making DIY, and indeed using, beeswax wraps is messy business. Rubbing alcohol will clean up drips and smudges, and hand sanitizer is your skin's best friend.

September 21, 2024

Quickly request EpiPens with 24/7 virtual care @ Amazon

Did you know…? Even if you don't have a doctor or insurance, you can get Epinephrine auto-injectors (EpiPens)! A virtual visit (telehealth) with a doctor with Amazon One Medical is just $29. 

While the cost to get your scrip is low, without insurance the cost to fill your prescription is still going to run you a couple hundred bucks, easily. But I thought I'd mention this option for people, especially those in the Medicaid gap, who need an epi auto-injector: OneMedical Epinephrine auto-injectors (EpiPens)

The complete list of conditions Amazon One Medical covers can be found here: https://health.amazon.com/onemedical/ppv/getstarted

July 28, 2024

Marty Hardison's Appropriate Beehive

Here's a sneak peek at Marty Hardison's redesigned top bar hive.

A new hive design, adjusting for climate change. Building specs to come.

He's having better success getting colonies through winters with this revised appropriate beehive.

Appropriate Beehive?

ap·pro·pri·ate
🔈 /əˈprōprēət/
adjective: suitable or proper in the circumstances

The NOAA climate forecast for Colorado predicts more heat, more drought, and greater amounts of winter snow, changes which have implications for colony survival. Good beekeepers give the bees what they need, when they need it, so Marty's adjusting what constitutes appropriate.

Having observed colonies in bee trees that have been surviving for years, whose combs are long not wide, he's made his hive 4 inches deeper to allow the bees to build longer combs. The new design still uses 16 1/2" top bars, which allows for interchangeability between hives and makes this design appropriate for both the bees and the beekeeper.

Marty isn't actively teaching the craft anymore, so he and I have been working on updating his booklet, The Appropriate Beehive. An instrumental guide, it includes building plans for the original Hardison Hive. On clicking through, you will need to request access to the document but if you do, I will send you the updated PDF as soon as it's available. I'm not sure I can promise instructions on adding the additional four inches to the top, but the new edition offers more details on keeping bees in a top bar hive that beginning topbar beekeepers will appreciate.

February 12, 2024

It's Make It Monday! How to craft without buying a single supply.

Did you know you can make customized products on Zazzle? I've toyed with it on and off, don't fully grasp how it works, but have made passive income every year since 2018. For 2023, the sent me a check for $50 which cost me $80 to report on my taxes. But, hey, it's fun and I get to make stuff without buying a single craft supply. So worth it.

What is "passive income" you ask? Bottom line, after your create a design and start selling it, you earn royalties and get paid without having to do anything else. No packaging, no printing packing lists or labels, no trips to the post office. Zazzle does all that for you. 

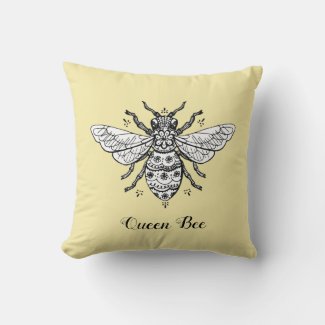
My Bee Merry, Bee Golden, and customizable beekeeper photo holiday cards are my biggest sellers, but here are a few of my favorite items for the rest of the year. I especially love my pillow, which is a two-sided design that you can get in cotton, poly, or even outdoor material. There's probably a Zazzle-way to flip the pillow, but until I find it you'll have to click though to see the other side. Hope you like it as much as I do!

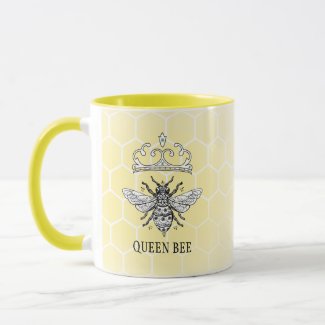
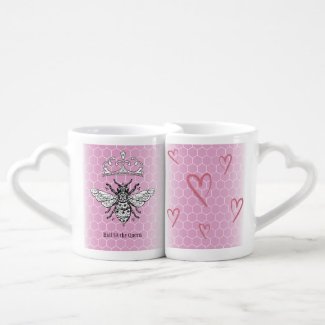
The thing I like most about Zazzle is being able to transfer a design to another product in mere seconds. Say you like the crowned queen bee design but you want it on a phone case instead. Easy peasy! Just click on "Transfer design to a product" and pick the product you need. Choosing from over 1,000 products is the hard part.

I put together a collection to give you ideas. Have fun!

And here's what I'm getting for Valentine's Day and my Mom is getting for Mother's Day!

February 05, 2024

PastryMade Rolling Pins: 5 Tips to Roll with the Best!

If you're wondering if PastryMade's rolling pins are worth the splurge, they are! The designs are laser-etched deeply to give you great results. There are dozens to choose from, and several are bee-themed. I bought Honeycomb, Morning Birds, and my third pin (not shown) is the Stand with Ukraine one, which literally supports families in the Ukraine.

Their butter cookie recipe (below) makes a really nice cookie that's not particularly sweet but not particularly rich either. Tender crisp, they are perfect with a cup of tea. The recipe is super easy, but here are some tips to help you get the best results from your specialty pins.

Tip #1: the Regular size is more than adequate, no need to spend another $10 for the Big rolling pin.

Tip #2: use spoon butter to prep your pins

Tip #3: a Silpat will give you the classic, blonde shortbread cookie look

Tip #4: rice flour gives you a nonstick work surface and tender reworked dough

Tip #5: clean the grooves with a toothbrush for perfect impressions time and time again.

These fall somewhere between a sugar cookie and a classic shortbread. 

Butter cookies made with the Honeycomb Rolling Pin.

I've made these with Irish butter and supermarket butter, and it doesn't make a huge difference. You can even use salted butter if that's what you've got. With the exception of needing to use a scale, it's a very forgiving recipe. The volume measurements (in parentheses) are close approximations.

Morning Birds, bottoms dipped in chocolate. A little bottom browning helps balance the flavors.

The recipe makes about 60 cookies. I can fit two dozen on a half-sheet and bake two sheets at a time, so the time spent actually baking is short. It's a good idea to bake one tray to start, to determine if you need to adjust your oven temperature up or down.

With the oven at the right temperature, baked cookies won't look much different from unbaked ones.

I bake at 350°F when using Super Parchment (top tray above), which tends to bottom brown the cookies, whereas Silpat (bottom tray above) isn't prone to that. I prefer my shortbreads blonde, but color = flavor so go for it if that's what you like. 

The recipe makes about 60 cookies.

PASTRYMADE BUTTER COOKIES

butter 200g / 7.05 oz. (14 Tbsp.)
1 egg
2 T. olive oil (I prefer something neutral, like avocado oil)
pinch of salt
flour 400g / 14.1 oz. (shy 3¼ cups)
icing (powdered) sugar 150g / 5.25 oz. (1⅓ c.)

It doesn't get any easier than this! Place all (room temperature) ingredients in the bowl of a mixer fitted with the paddle attachment. Mix until thoroughly combined. Roll, cut, bake.

Ready for the TMI?

Rest the dough in the fridge while you prep your rolling pin(s). I don't like the idea of using oil, which will eventually go rancid. Instead, I recommend treating it with spoon butter, which is more durable and won't need to be repeated as often. Use a manual toothbrush to really work it into the engraved details. The warmth of your hands can help it penetrate the wood.

Working with half the dough, use a regular rolling pin and roll to a thickness somewhere between ⅛- and ¼-inch. Lightly dusting your work surface and the dough with rice flour will help you get the best impression from your engraved pin. Rice flour has no gluten so won't toughen up your cookies even after rerolling the scraps.

Though the pins spin nicely on their handles, I find that using them requires a slight forward push which stretches and tears the dough. Not using the handles, treating it like a French pin, works better for me. Use more downward pressure than forward pressure (though I suppose you could start from the far edge and roll toward yourself). For evenly thick cookies start to finish, make a mental note of how the downward pressure feels. The dough expands forward as it's manipulated by a small amount, but there is no stretching (so there's no rebound and your cookies keep their shape as they bake). If the impression isn't as intense as you'd hoped, you can flip the dough over and try again if it's thick enough. I probably do it 50% of the time.

My favorite cutters are a fluted 38mm/1½" and 48mm/1⅞". Since the cookies don't expand, I place them practically touching each other on a lined half-sheet. Silpat are ideal. Super Parchment is a less expensive sustainable option. Parchment paper, especially the thin cheap kind, can get wavy as the dough releases moisture, producing cookies that aren't flat. Gather the scraps, reroll and cut until you run out of dough. You'll roll out the other half of the dough while the first batch bakes.

Clean the pin with the toothbrush if the dough starts sticking (and when you're done for the day). To help the pattern be most visible, PastryMade recommends chilling the sheet of cookies for 20-30 minutes but I don't bother. While the oven preheats and by the time I've loaded up two cookie sheets, they've rested plenty.

The original recipe says to bake at 200°, which I didn't realize was Celsius until several minutes after they were supposed to be done baking, they just looked wet and raw. Converted that's 392°F but I find it too hot. It makes the cookies puff up so the design gets stretched and muted, plus the cookies don't bake through evenly. At lower temperatures, the cookies don't budge, so the design stays crisp and the bottom is evenly golden. As with all cookies, if you don't see them at least starting to turn gold on the edges, you run the risk of the cookies tasting flour-y and being a little chewy (underbaked). You can bake multiple trays at a time, rotating and swapping trays midway. Depending on how thick your cookies are, bake for 9-15" per batch. Transfer the cookies to a cooling rack and repeat with the other half of the dough.

These cookies taste like a lightly sweet, classic shortbread. A trio of them is a good accompaniment to a cup of tea any day.

BONUS TIPS for making it to the bottom of this post!

#1: No Pressure! the Buy 2 Get 1 promotion is perpetual, despite PastryMade's constant ads (and website) saying Only Today. Try THANKS10 for 10% off your order.

#2: Use milk chocolate if you're decorating the cookies; their delicately flavor is overwhelmed by dark chocolate.

#3: Scraping seeds from half a vanilla bean gives these simple cookies a greater depth of flavor.

Let me know if you make these cookies, and if you used a fancy rolling pin! 

December 02, 2023

A beekeeper's winter reading list: 3 ultrashort book reviews

The title is one of many honey bee factoids smattered throughout the book.

A Honeybee Heart Has Five Openings: A Year of Keeping Bees

Originally from London, Helen Jukes gets lucky in a multitude of ways, not the least of which is friends who gifted her bees… and Luke Dixon for a beekeeping mentor! She's a bit on the nerdy side, and there's lots of beekeeping facts and factoids in her memoir. Plus she has a top bar hive!  ⭐⭐⭐⭐ I'd've given it 5-stars if the title were more than a factoid. Maybe it's a hint that this is a "I found love" story? If so, I don't know what the other four things she found were. Read it and let me know what I missed!

Another true story, Meredith May, weaves a surprising amount of beekeeping details into The Honey Bus.

The Honey Bus: A Memoir of Loss, Courage and a Girl Saved by Bees

A broken family at a young age, displaced and impoverished… This one resonated with me because my mom, like Meredith's, had a seriously messed up childhood which was not without ramifications for her children. But her grandfather is a beekeeper, and life lessons from him and the bees enable her to not just survive but to triumph. "He showed me how bees are loyal and brave, how they cooperate and strive, all the things I'd need to be when it was my time to navigate solo." This book made me really miss beekeeping! ⭐⭐⭐⭐⭐

My husband is getting me a t-shirt that says, "I read banned books. 📚"
Trigger warnings: attempted suicide, bullying, child abuse, domestic violence, LGBTQIA+ violence

Mad Honey: A Novel by Jodi Picoult and Jennifer Finney Boylan

Every time I get vaccinated, I tell the nurse that I completed VIT. Naturally, the beekeeping conversation ensues, and this time the nurse said, "You must read Mad Honey!" You would not expect a murder mystery to have the word "bees" 39 times in chapter one, but wow, what a great start. Of course there's a plot twist, and this one's was unexpected in not the usual unexpected way. If you're looking for more inclusiveness in your literature, this New York Times Bestseller covers the bases. At the end there are recipes. The one I'm wanting to make the most instructs, "Bake in oven for 40 minutes, or until an impossible thing comes true. Whichever comes first." ⭐⭐⭐⭐ (Download the PDF from the Google Colaboratory.)

Who else picks books by their covers?

Glory Be by Danielle Arceneaux. Set in Louisiana (relatively close by), another crime and social issues novel is my next pick. What's on your reading list? 

October 29, 2023

Olympian Fig Tree, Air Layer vs. Cutting Prop

ON THE TOPIC of bees, figs can't be bee-pollinated! Their flowers are inverted and require a specialized pollinator. They're pollinated by wasps, aptly called fig wasps.

OFF-TOPIC: Here's an update on my fig tree propagations. As a reminder, in July 2023 I took one stem cutting and did an air-layer. The donor tree was dying from root knot nematodes (RKN), and the timing was ideal. But I didn't know if one method was better than the other. Have a look at how they compare —with updates into 2025.

Cut-branch propagation, 6-weeks from being taken off the donor plant (R) and being rooted in soil. Here it's getting its third pot-up. The donor plant is no worse for the wear of taking props.

Air-layered propagation: despite my negligence and letting the sphagnum dry out, look at that root formation! Click on the picture for a zoomable view.

Late-August 2023 (6 weeks after taking the cuttings): The cutting prop lost all but one leaf but then grew so fast it had to be potted up three times. It put all its energy into a single trunk. The well-rooted air-layer prop's first potting was into a 1-gallon nursery pot, where it sent up a whole new branch. The difference in leaf size is remarkable. The cutting (in the grow bag in the photo below) is pushing out huge leaves. I can only guess that the single trunk, which is thickening up nicely, is funneling lots of energy into leaf production. 

Another 6 weeks: The air-layer prop doubled its number of leaves and is working to push out a third branch. I wasn't planning on potting up again but the squirrels dumped it over, looking for a place to plant acorns.

It rains so much here in Virginia, 20 inches in a 3-month period this summer, there's no such thing as a pot with too much drainage. Fabric grow bags work pretty well but you do have to watch out for mold and mushrooms growing on the bags. I haven't had ants move into my grow bags like they do my plastic pots. Every pot with a drainage hole has an ant problem, that is, until I scratch neem seed meal into the soil. It takes care of them like magic! Even though I have a solution, I'd rather not have the problem in the first place, so I'm switching to grow bags whenever possible.

The green fibrous stuff is Better Than Rocks, which I use in my outdoor pots with drainage holes. It is the only physical barrier I've found that keeps the ants from using the holes as doorways to their new favorite home.

I repotted the dumped over fig into a grow bag like its sibling. It's not quite apples-to-apples, though, because it has superior drainage with a bottom layer of Better Than Rocks. Container-grown figs will let you know if they aren't getting enough drainage, through brown spots on the leaves.

The Three Little Figs

October 2023: I finally found a use for nonrecyclable plastic onion bags! They're pretty effective at keeping the squirrels from planting acorns (until they break apart from exposure to the elements). The purple one is the cutting prop, red is the air-layered prop. See the difference in leaf size? The comparison is somewhat unfair, though. The air-layer was attached to a stressed donor plant (on the right). The donor has lots of fresh RKN galls so the neem seed meal and straight vermicompost did not remedy that problem. I'm having a hard time with the thought of throwing it away but it's too late in the year to take more propagations. What would you do?

April 2024 Update

Winter's are pretty mild in coastal VA. The trees stayed outside all winter, their pots simply snugged up against the brick wall of our condo. They even held their leaves throughout the dormancy period, Nov-March.

The cutting prop is single-stemmed and about 2-feet tall. The air-layer tree split into two branches so is half the height.

tree-form from cutting prop (L), multi-stem from air-layer prop (R)

June 2024 Update

Double bumps! They're a fig tree thing. One bud is a lateral (branch) bud; the other is a figlet or fig "embryo." Fig trees generally bear fruit on new, growing shoots (green wood) but may also fruit on one-year-old stems.

Double Bump: which is a branch bud and which is a figlet is TBD. Gotta guess?

July 2024

One year since taking the cuttings: nothing to report so here's a recipe! Roasted Figs with Mascarpone, from Mark Bittman's How to Bake Everything (highly recommend!)
July: the cutting-prop tree, right outside the kitchen door, is now 3-feet tall.

Late-August 2024 update

I'm seeing figs at the farmers markets, so I guess all my trees are giving me in 2024 is vegetative growth.
purple = cutting propagated, single-stemmed fig tree; red = air-layer propagated, multi-branched fig tree
One-year old trees are capable of fruiting but mine are waiting for year 2. As a matter of fact, I can see the formation of a breba! Brebas are a small Spring crop produced on last year's new growth. According to the Fig Boss, it comes 4-6 weeks ahead of the main Summer crop. 
Double bumps on the vertical tree form (cutting prop). Pointy buds are branch buds.

The rounded bump is the breba. This one's on the multi-branched shrub form.

April 2025 

Both trees overwintered 2024/25 in 3-gallon plastic pots. I re-homed the air-layered prop in a 17" rolling planter as its permanent home. That's as big as I can go with my tiny patio garden. 
Unfortunately, despite taking precautions the cutting-propagated tree developed RKN so it went into the trash.
In nursery terms, I think this planter would be equivalent to a 10-gallon container.
So this is where my almost 2-year old—started from an air-layer—fig tree is at. Now we wait for fruit.

More reading on fig pollination: Everything You Never Wanted To Know About Figs

October 26, 2023

HOW TO: Using Waxing Wafers to make DIY Beeswax Wraps

Waxing wafers are beeswax, resin and jojoba oil in convenient Ready-to-Use premixed form. Use to make new food wrappers, or to refresh ones you already own. Available now in my Etsy shop. 

Whether you're reducing plastic use or substituting foil, my formulation is extra sticky, so your DIY beeswax wrappers will actually work!

SUGGESTED USE

  • Small Wrap (7 x 7 inch): 1/2 wafer
  • Medium Wrap (13 x 13 inch): 2 wafers
  • Large Wrap (16 x 16 inch): 3 wafers
  • Jumbo Wrap (20 x 20 inch): 4 wafers
  • Infinitely Useful Gift Wrap (25 x 25): 4 wafers – using saved ribbons to tie up presents, you can make even larger wraps that become gifts themselves. Gifts that keep on giving!

DIY Beeswax Wraps Waxing Wafers, 4 for $3 plus cost to mail

What You’ll Need

  • DIY Beeswax Wraps Waxing Wafers from my Etsy shop
  • tight weave fabric, preferably 100% cotton or other lightweight natural fiber
  • a clothing iron
  • two pieces of baking parchment, heavy duty if available
  • heat-safe working surface like an ironing board; I use a 13x18" Epicurean cutting board
  • scissors (or pinking shears for less fraying)
  1. Lay a sheet of parchment on your work surface.
  2. Lay your fabric on the parchment.
  3. Set your iron to cotton (medium-high).
  4. Pinch off pieces of waxing wafer and distribute them over your fabric. Not too much! It's better to put on too little, getting the dry spots in a second pass.
  5. Cover with another sheet of parchment.
  6. Press the iron over the wax pieces, spreading the pools of melted wax outward. Try to stay within the confines of the parchment.
  7. Peel off and let cool (about 30 seconds). Your beeswax wrap is ready to use!

Clean as you work. Use hand sanitizer to clean sticky fingers before handling your iron.

Watching the wax melt and move under the parchment is the fun part!

Don't forget to turn off and unplug your iron.

TIPS

  • If you do use too much, iron another piece of fabric over the extra-waxy spot and it'll absorb it. 
  • Cutting to size after waxing the fabric results in less fraying than cutting beforehand. Hemming the edges is not recommended unless you're sewing a plastic-free baggie.
  • When finished, save the parchment. The wax that has cooled on it is ideal for refreshing work-weary wraps.
  • Use rubbing alcohol to clean the handle of your iron, and other waxy smudges.
  • Use hand sanitizer to clean tacky fingers.

USE & CARE

  • Store unused waxing wafers in a cool, dry place. Best if used within 2 years.
  • Unlike plastic wrap which clings readily to glass and ceramic, beeswax wrap functions a little differently. Beeswax wrap clings more to itself than whatever you're wrapping. Pleat and press it onto itself until you're happy with the seal.
  • If you were generous with the wax application, you'll find waxy residue on your unwrapped items. A little rubbing alcohol will clean that right up, but don't use it on anything painted or varnished.
  • To clean your wraps, wipe gently and rinse with cool-to-tepid water. Use a very small amount of dish soap if necessary. Do not scrub. Hang to dry.

I hope this helps you on your plastic-free journey. Leave any questions/comments you have below.

https://backyardbeehive.etsy.com/listing/1551131475/diy-beeswax-wraps-waxing-wafers-premixed

In complete transparency, sometimes a container has a funny shape so I use a rubber band to secure its wrap. It enables me to stay plastic-free, and that makes me happy.